
Kafka Connect JDBC Source Connector
Getting data from database to Apache Kafka is certainly one of the most popular use case of Kafka Connect. Kafka Connect provides scalable and reliable way to move the data in and out of Kafka. As it uses plugins for specific plugins for connectors and it is run by only configuration (without writing code) it is an easy integration point.
Visit the Kafka Connect Basics post if you would like to get an introduction.
1- Running Kafka Cluster
We can use the following docker-compose file to get Kafka cluster with a single broker up and running.
version: '2'
services:
  zookeeper:
    image: confluentinc/cp-zookeeper:latest
    hostname: zookeeper
    container_name: zookeeper
    ports:
      - "2181:2181"
    environment:
      ZOOKEEPER_CLIENT_PORT: 2181
      ZOOKEEPER_TICK_TIME: 2000

  kafka:
    image: confluentinc/cp-kafka:latest
    hostname: kafka
    container_name: kafka
    depends_on:
      - zookeeper
    ports:
      - "9092:9092"
      - "29092:29092"
    environment:
      KAFKA_BROKER_ID: 1
      KAFKA_ZOOKEEPER_CONNECT: zookeeper:2181
      KAFKA_LISTENER_SECURITY_PROTOCOL_MAP: PLAINTEXT:PLAINTEXT,PLAINTEXT_HOST:PLAINTEXT
      KAFKA_ADVERTISED_LISTENERS: PLAINTEXT://kafka:9092,PLAINTEXT_HOST://localhost:29092
      KAFKA_OFFSETS_TOPIC_REPLICATION_FACTOR: 1
If you would like to use a user interface rather than console tools to manage the Kafka, Confluent Control Center is one of the best choice. It is commercial tool but it comes with 30 days licence. There are also Landoop UI which has Kafka Connect management interface as well. If you would like to use Confluent Control Center you can add it as a service to the docker-compose file as follows:
control-center:
    image: confluentinc/cp-enterprise-control-center:5.5.1
    hostname: control-center
    container_name: control-center
    depends_on:
      - zookeeper
      - kafka
    ports:
      - "9021:9021"
    environment:
      CONTROL_CENTER_BOOTSTRAP_SERVERS: 'kafka:9092'
      CONTROL_CENTER_ZOOKEEPER_CONNECT: 'zookeeper:2181'
      CONTROL_CENTER_REPLICATION_FACTOR: 1
      CONTROL_CENTER_INTERNAL_TOPICS_PARTITIONS: 1
      CONTROL_CENTER_MONITORING_INTERCEPTOR_TOPIC_PARTITIONS: 1
      CONFLUENT_METRICS_TOPIC_REPLICATION: 1
      PORT: 9021
2- Preparing Connector Library
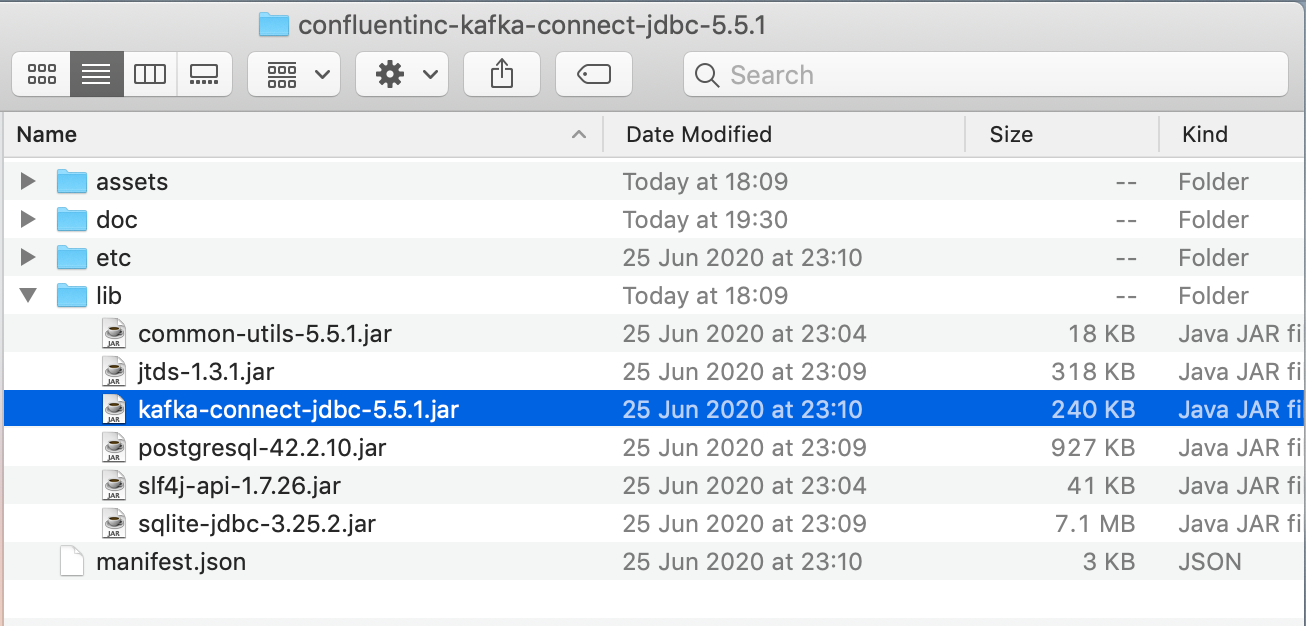
Download the Kafka Connect JDBC plugin from Confluent hub and extract the zip file to the Kafka Connect's plugins path. While we start Kafka Connector we can specify a plugin path that will be used to access the plugin libraries. For example plugin.path=/usr/local/share/kafka/plugins. Check Install Connector Manually documentation for details.
We also need JDBC 4.0 driver as it will be used by the connector to communicate with the database. Postgresql and sqlite drivers are already shipped with JDBC connector plugin. If you like to connect to another database system add the driver to the same folder with kafka-connect-jdbc jar file. See Installing JDBC Driver Manual.
3- Running Kafka Connect
We can run the Kafka Connect with connect-distributed.sh script that is located inside the kafka bin directory. We need to provide a properties file while running this script for configuring the worker properties.
connect-distributed.sh <worker properties file>We can create create connect-distributed.properties file to specify the worker properties as follows:
# A list of host/port pairs to use for establishing the initial connection to the Kafka cluster.
bootstrap.servers=localhost:29092

# unique name for the cluster, used in forming the Connect cluster group. Note that this must not conflict with consumer group IDs
group.id=connect-cluster

# The converters specify the format of data in Kafka and how to translate it into Connect data.
key.converter=org.apache.kafka.connect.json.JsonConverter
value.converter=org.apache.kafka.connect.json.JsonConverter
key.converter.schemas.enable=true
value.converter.schemas.enable=true

# Topic to use for storing offsets. This topic should have many partitions and be replicated and compacted.
offset.storage.topic=connect-offsets
offset.storage.replication.factor=1

# Topic to use for storing connector and task configurations; note that this should be a single partition, highly replicated,
config.storage.topic=connect-configs
config.storage.replication.factor=1

# Topic to use for storing statuses. This topic can have multiple partitions and should be replicated and compacted.
status.storage.topic=connect-status
status.storage.replication.factor=1

# Flush much faster than normal, which is useful for testing/debugging
offset.flush.interval.ms=10000

plugin.path=/Users/cemalturkoglu/kafka/plugins
Note that the plugin.path is the path that we need to place the library that we downloaded.
After running the connector we can confirm that connector's REST endpoint is accessible, and we can confirm that JDBC connector is in the plugin list by calling http://localhost:8083/connector-plugins
[{"class":"io.confluent.connect.jdbc.JdbcSinkConnector","type":"sink","version":"5.5.1"},{"class":"io.confluent.connect.jdbc.JdbcSourceConnector","type":"source","version":"5.5.1"},{"class":"org.apache.kafka.connect.file.FileStreamSinkConnector","type":"sink","version":"2.6.0"},{"class":"org.apache.kafka.connect.file.FileStreamSourceConnector","type":"source","version":"2.6.0"},{"class":"org.apache.kafka.connect.mirror.MirrorCheckpointConnector","type":"source","version":"1"},{"class":"org.apache.kafka.connect.mirror.MirrorHeartbeatConnector","type":"source","version":"1"},{"class":"org.apache.kafka.connect.mirror.MirrorSourceConnector","type":"source","version":"1"}]4. Starting the JDBC Connector
As we operate on distributed mode we run the connectors by calling REST endpoints with the configuration JSON. We can specify the configuration payload from a file for curl command. The following command starts the connector.
curl -d @"jdbc-source.json" \
-H "Content-Type: application/json" \
-X POST http://localhost:8083/connectors
The configuration for the plugin is stored in jdbc-source.json file can be as follows:
{
    "name": "jdbc_source_connector_postgresql_01",
    "config": {
        "connector.class": "io.confluent.connect.jdbc.JdbcSourceConnector",
        "connection.url": "jdbc:postgresql://localhost:5432/demo",
        "connection.user": "postgres",
        "connection.password": "root",
        "topic.prefix": "postgres-01-",
        "poll.interval.ms" : 3600000,
        "mode":"bulk"
    }
}- The connector connects to the database with using the JDBC URL and connection credentials.
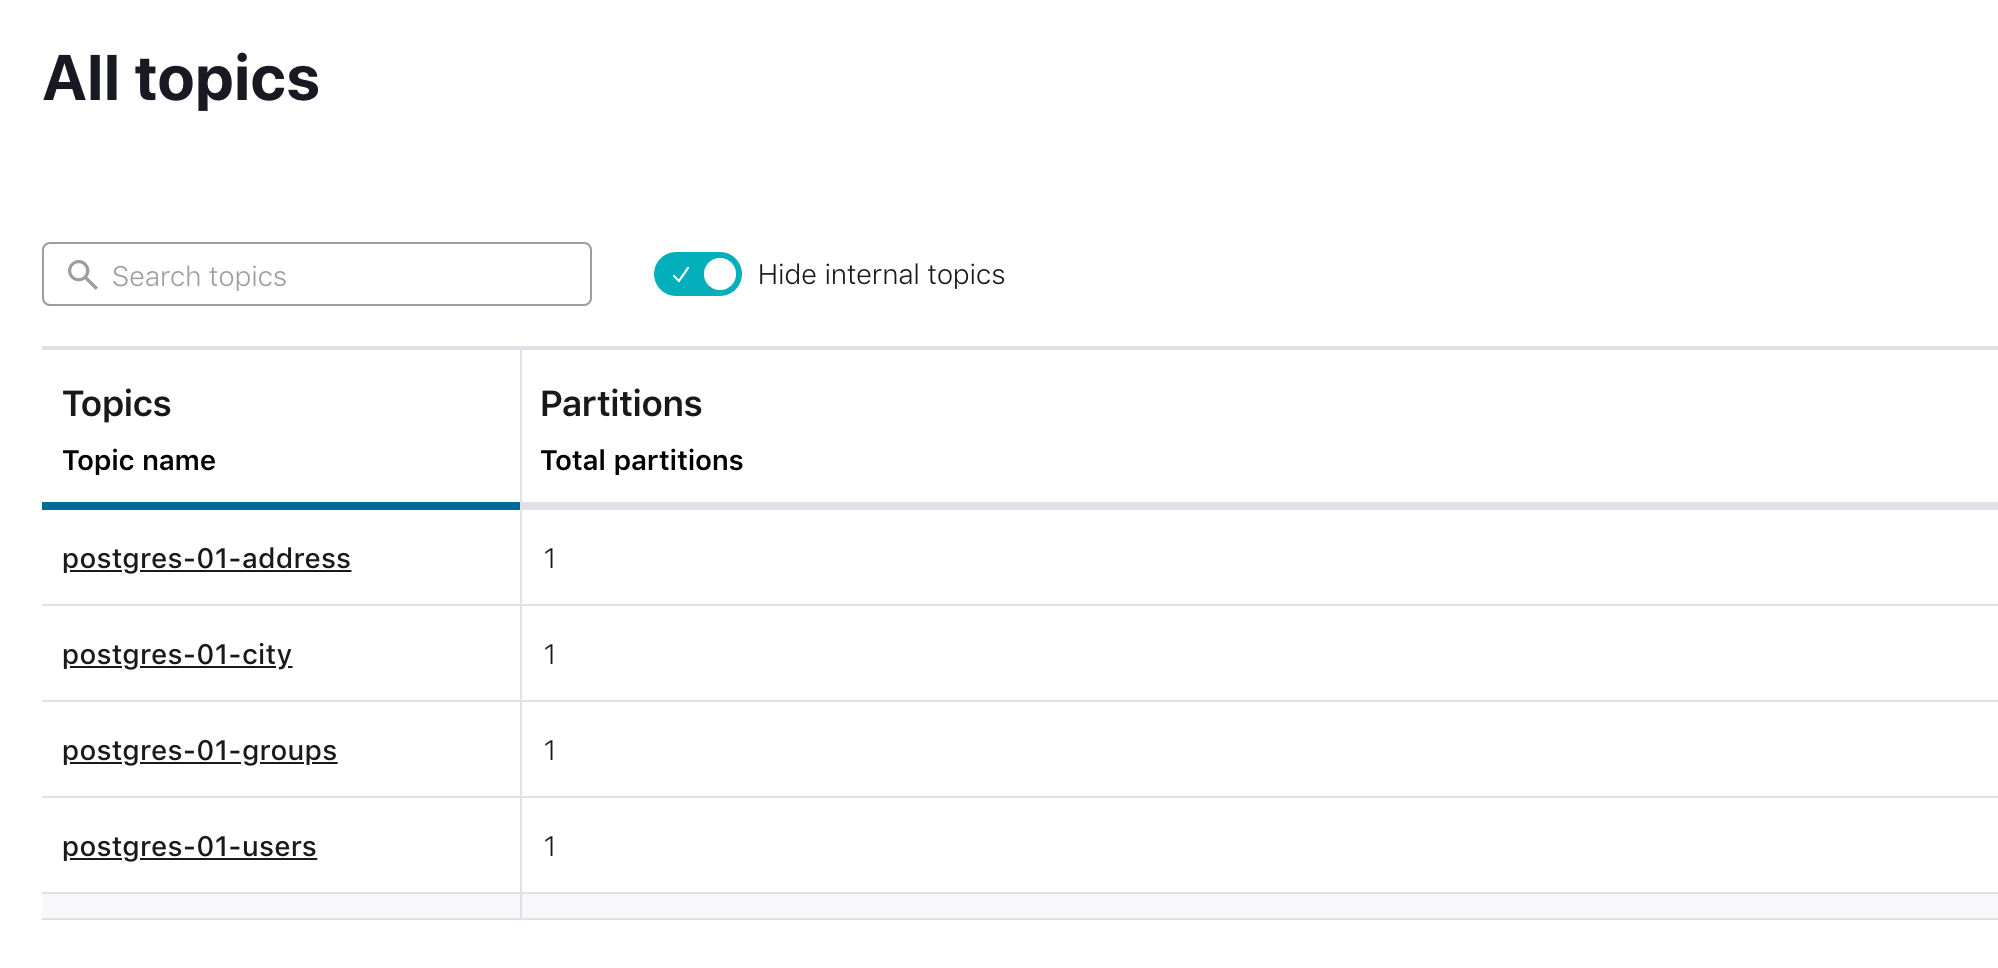
- It will create kafka topic per table. Topics are named with the
topic.prefix+ <table_name> - The data is retrieved from database with the interval specified by
poll.interval.msconfig. - The
modeconfiguration is to specify the working mode which will be discussed below. Bulk mode is used to load all the data.
We can see that my demo database with 4 tables are loaded to the 4 kafka topics:
And each row in the tables are loaded as a message.
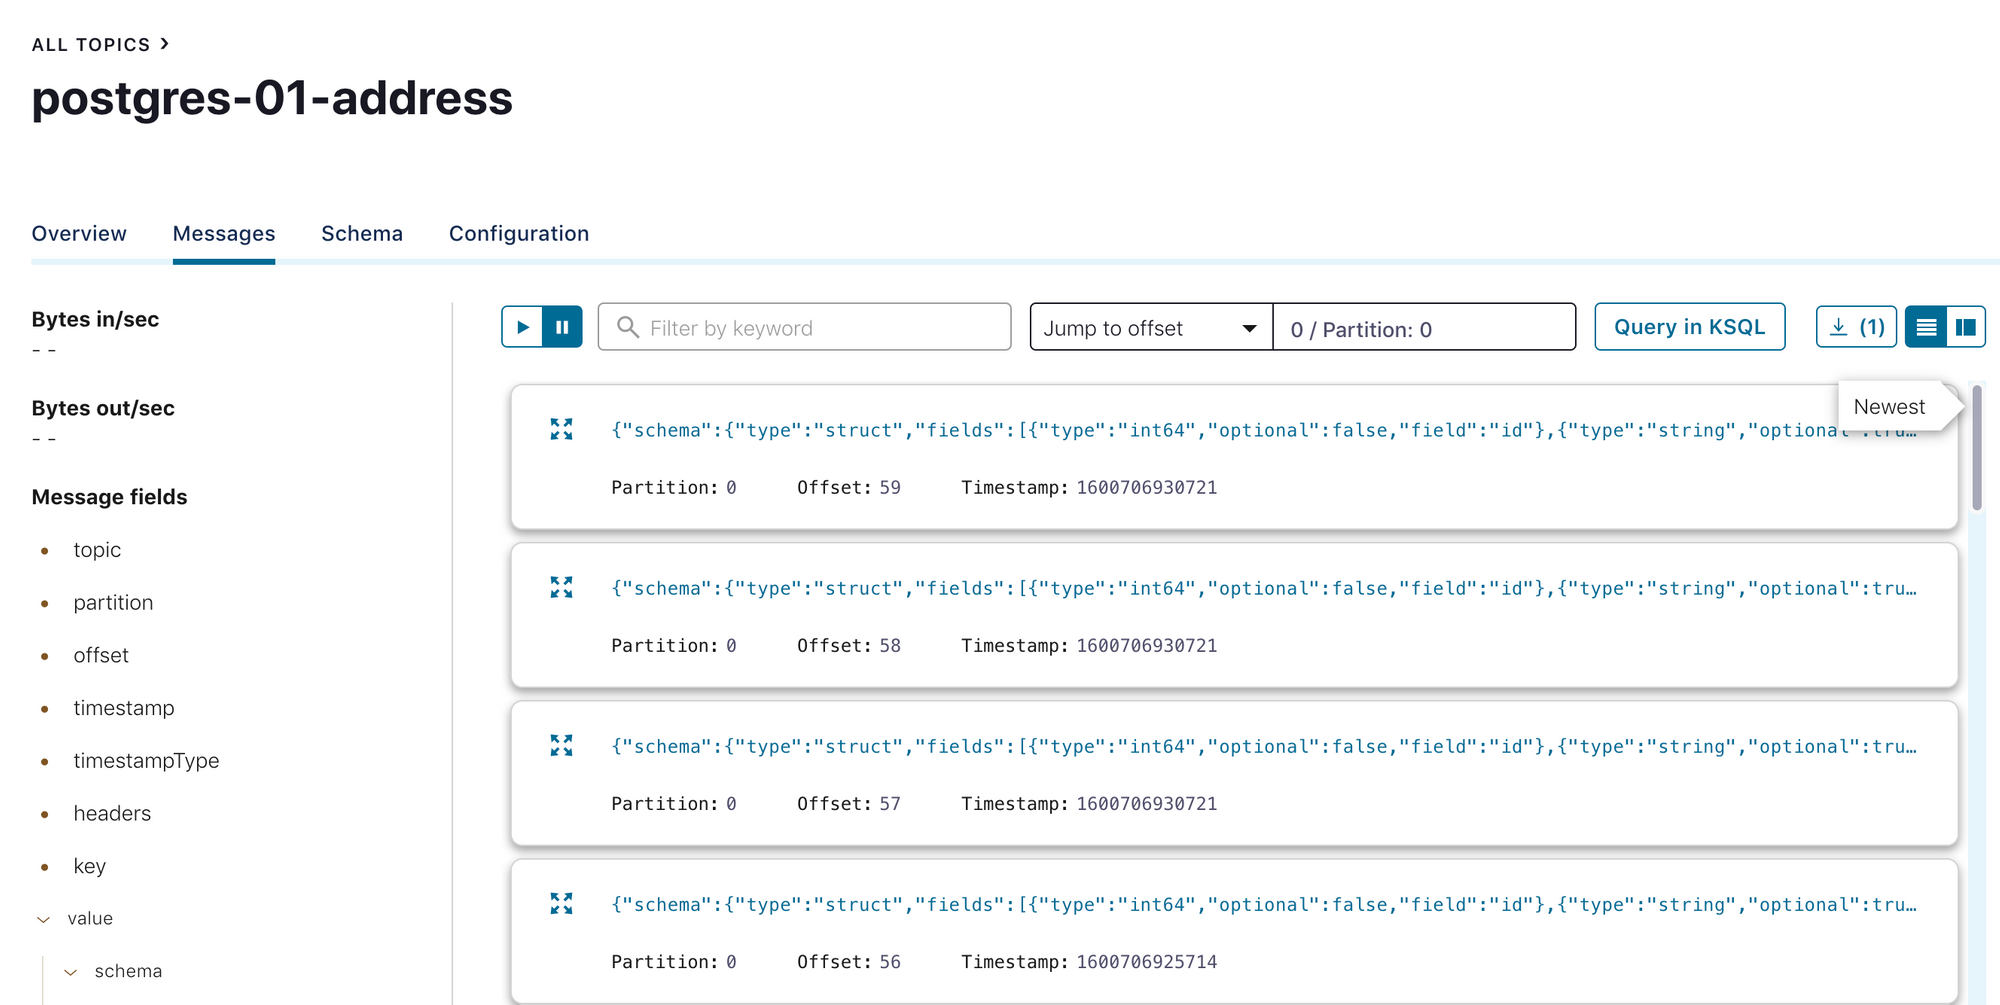
The message contains the following fields:
{
  "schema": {
    "type": "struct",
    "fields": [
      {
        "type": "int64",
        "optional": false,
        "field": "id"
      },
      {
        "type": "string",
        "optional": true,
        "field": "flat"
      },
      {
        "type": "string",
        "optional": true,
        "field": "postal_code"
      },
      {
        "type": "string",
        "optional": true,
        "field": "street"
      },
      {
        "type": "string",
        "optional": true,
        "field": "title"
      },
      {
        "type": "int64",
        "optional": true,
        "field": "city_id"
      },
      {
        "type": "int64",
        "optional": true,
        "field": "user_id"
      }
    ],
    "optional": false,
    "name": "address"
  },
  "payload": {
    "id": 3,
    "flat": "3/1B",
    "postal_code": "ABX501",
    "street": "Street2",
    "title": "work address",
    "city_id": 7,
    "user_id": 3
  }
}
Note that it contains the fields attribute with the information about the fields and payload with the actual data.
Selecting Schema and Tables To Copy
We can use catalog.pattern or schema.pattern to filter the schemas to be copied.
By default all tables are queried to be copied. However we include or exclude the list of tables in copying by table.whitelist and table.blacklist configurations. We can use either blacklist or whitelist at the same time.
table.whitelist:"Users,Address,City"
table.blacklist:"Groups"
Query Modes
There are alternative incremental query modes to bulk mode which is used in the above demonstration. Incremental modes can be used to load the data only if there is a change. Certain columns are used to detect if there is a change in the table or row.
bulk: In this mode connector will load all the selected tables in each iteration. If the iteration interval is set to some small number (5 seconds default) it wont make much sense to load all the data as there will be duplicate data. It can be useful if a periodical backup, or dumping the entire database.
incrementing: This mode uses a single column that is unique for each row, ideally auto incremented primary keys to detect the changes in the table. If new row with new ID is added it will be copied to Kafka. However this mode lacks the capability of catching update operation on the row as it will not change the ID. incrementing.column.name is used to configure the column name.
timestamp: Uses a single column that shows the last modification timestamp and in each iteration queries only for rows that have been modified since that time. As timestamp is not unique field, it can miss some updates which have the same timestamp. timestamp.column.name is used to configure the column name.
timestamp+incrementing: Most robust and accurate mode that uses both a unique incrementing ID and timestamp. Only drawback is that it is needed to add modification timestamp column on legacy tables.
query: The connector supports using custom queries to fetch data in each iteration. It is not very flexible in terms of incremental changes. It can be useful to fetch only necessary columns from a very wide table, or to fetch a view containing multiple joined tables. If the query gets complex, the load and the performance impact on the database increases.
Incremental Querying with Timestamp
Using only unique ID or timestamp has pitfalls as mentioned above. It is better approach to use them together. The following configuration shows an example of timestamp+incrementing mode:
{
    "name": "jdbc_source_connector_postgresql_02",
    "config": {
        "connector.class": "io.confluent.connect.jdbc.JdbcSourceConnector",
        "connection.url": "jdbc:postgresql://localhost:5432/demo-db",
        "connection.user": "postgres",
        "connection.password": "root",
        "topic.prefix": "postgres-02-",
        "table.whitelist": "store,tag,category,address,city",
        "mode":"timestamp+incrementing",
        "timestamp.column.name": "last_modified_date",
        "validate.non.null": false,
        "db.timezone": "Europe/Warsaw"
    }
}
Note the validate.non.null is used because connector requires the timestamp column to be NOT NULL, we can either set these columns NOT NULL or we can disable this validation with setting validate.not.null false.
While using the timestamp column timezone of the database system matters. There might be different behaviour because of time mismatches so it can be configure by db.timezone.
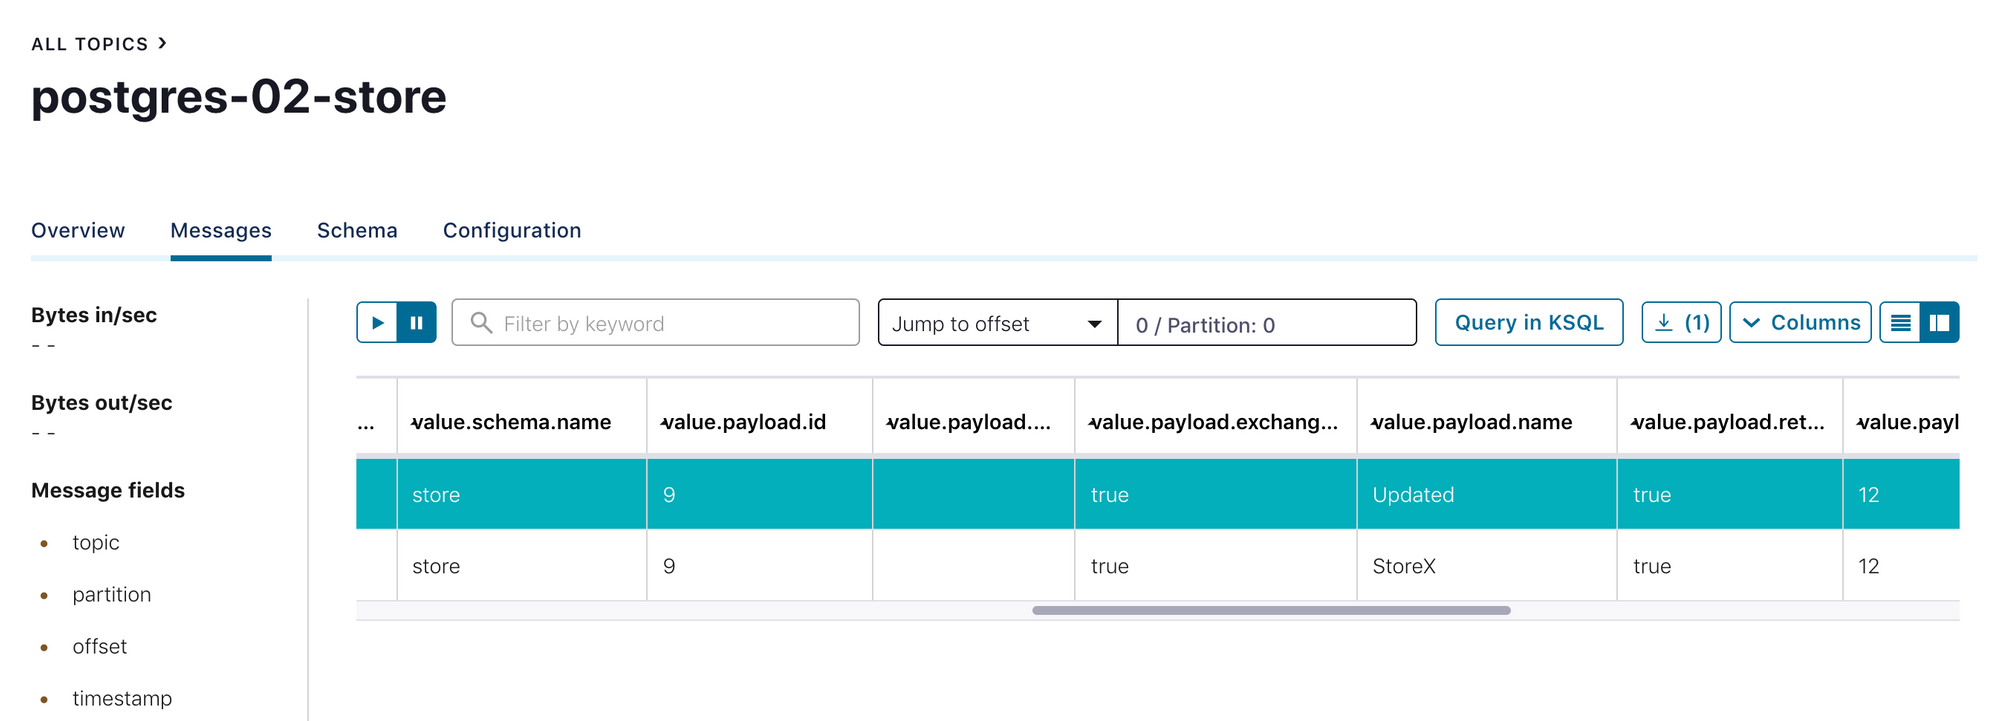
table.whitelist configuration is used to limit the tables to given list. So these 5 tables are copied to Kafka topics.
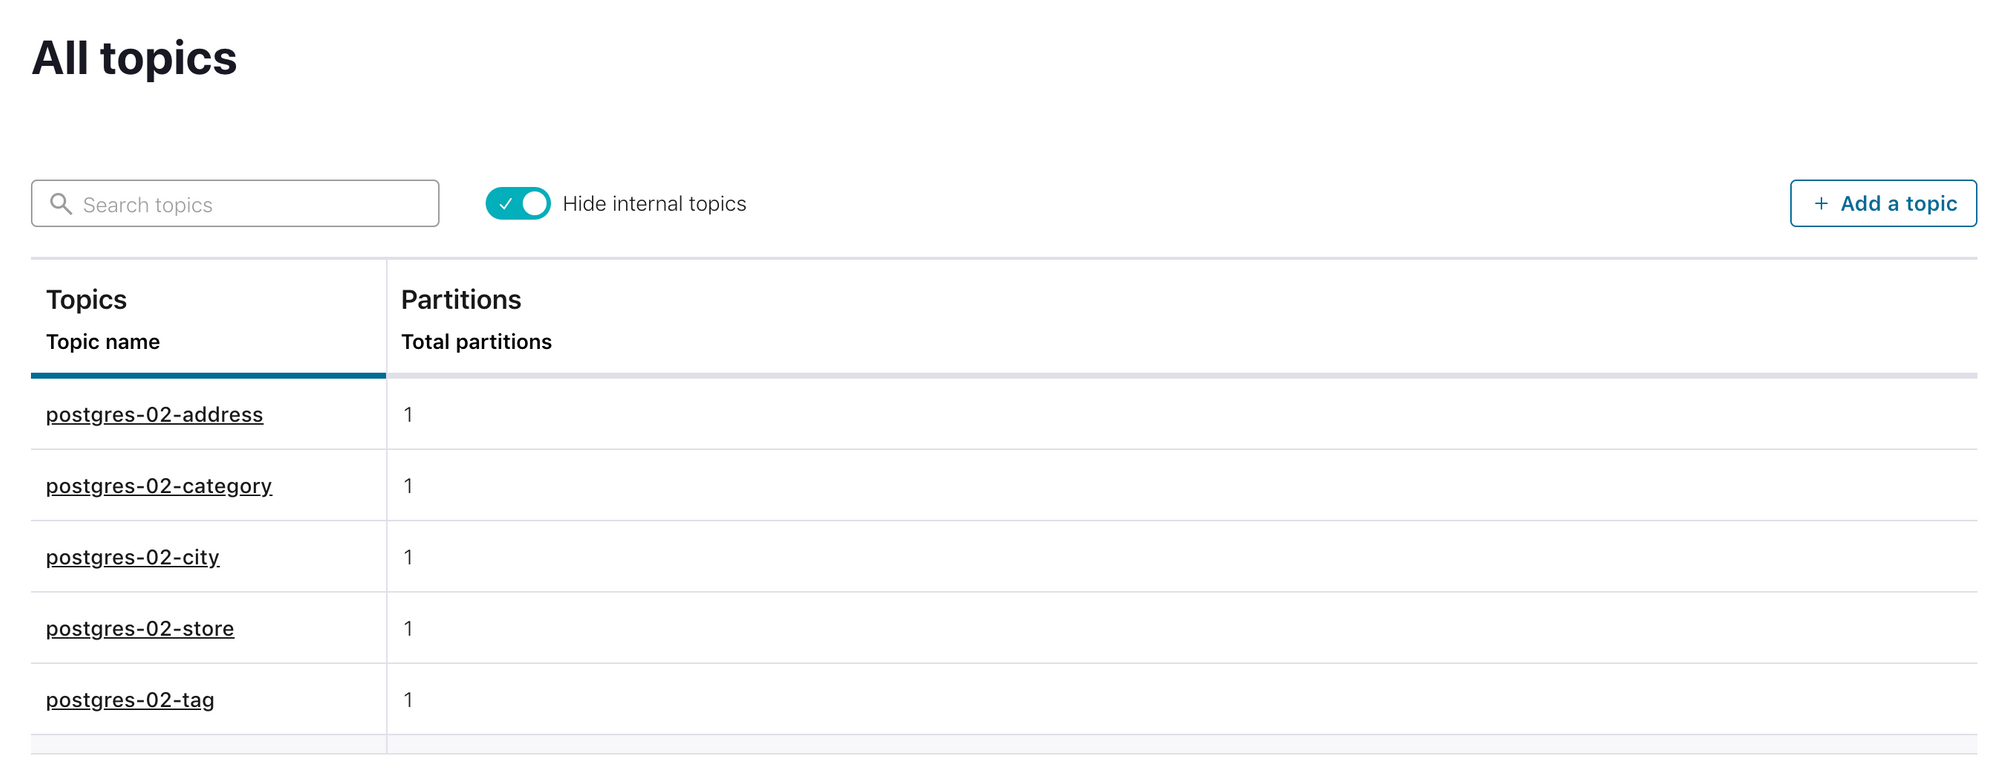
It is mentioned above that using incrementing mode without timestamp causes not capturing the UPDATE operations on the table. With the timestamp+incrementing mode update operations are captured as well.
Final words
JDBC Connector is great way to start for shipping data from relational databases to Kafka. It is easy to setup and use, only it is needed to configure few properties to get you data streamed out. However there are some drawbacks of JDBC connector as well. Some of the drawbacks can be listed as:
- It needs to constantly run queries, so it generates some load on the physical database. To not cause performance impacts, queries should be kept simple, and scalability should not be used heavily.
- As the incremental timestamp is mostly needed, working on legacy datastore would need extra work to add columns. There can be also cases that it is not possible to update the schema.
- JDBC Connector can not fetch DELETE operations as it uses SELECT queries to retrieve data and there is no sophisticated mechanism to detect the deleted rows. You can implement your solution to overcome this problem.